Skin draw simple very
Table of Contents
Table of Contents
Are you an aspiring artist looking to improve your drawing skills? One of the most challenging aspects of drawing is creating realistic skin texture with pencil. Whether you’re drawing a portrait or a figurative piece, skin texture is an essential element that can make or break your artwork. In this blog post, we will share tips and techniques on how to draw skin texture with pencil like a pro.
As an artist, you may have experienced frustration when trying to create realistic skin texture with pencil. It’s not easy to capture the intricacies of the human skin, such as wrinkles, pores, and freckles. Additionally, if the skin texture is not accurate, the overall impression of the artwork may not be convincing. This makes creating skin texture with pencil one of the biggest pain points for artists.
The key to successfully drawing skin texture with pencil is to understand the anatomy of the skin. This includes knowledge of the layers of the skin, the direction of the pores, and how light interacts with the skin. By mastering these elements, you can create a realistic and believable skin texture that will take your artwork to the next level.
In summary, to draw skin texture with pencil, you need to have a strong understanding of the anatomy of the skin, including the layers and direction of pores, and how to work with light. By mastering these elements, you can capture a realistic and believable skin texture in your artwork.
Understanding the Target of How to Draw Skin Texture with Pencil
As an artist, drawing skin texture with pencil can be both challenging and rewarding. Knowing how to accurately capture the various nuances of the skin can take your artwork to the next level. When I first started drawing skin texture with pencil, I struggled with making it look realistic. However, through practice and understanding the elements of skin anatomy, I learned how to master the art of realistic skin texture with pencil.
 The first step in drawing skin texture with pencil is to start by sketching the basic outline and shape of the face or body part you are drawing. Once you have the basic shape in place, you can work on the texture by using cross-hatching, stippling, or other techniques. When creating skin texture, it’s important to observe the direction of the pores in the skin and create strokes that mimic those directions. Additionally, varying the pressure and thickness of your strokes can help create depth and realism in your skin texture.
The Importance of Lighting in Drawing Skin Texture with Pencil
Another essential aspect of drawing skin texture with pencil is understanding how lighting affects the skin. By manipulating the direction and intensity of light, you can create interesting shadows, highlights, and depth in your artwork. When drawing skin texture, it’s crucial to observe the light source and create shading and texture that accurately represents the way light interacts with the skin.
 ### The Layers of the Skin
When it comes to drawing skin texture with pencil, understanding the layers of the skin is crucial. The skin consists of three main layers: the epidermis, dermis, and hypodermis. The epidermis is the outermost layer of the skin and is the layer that is visible in a drawing. The dermis is the second layer of the skin and contains collagen and elastin, which give the skin its flexibility and strength. The hypodermis is the deepest layer of the skin and contains fat cells and connective tissue.
 #### The Direction of Pores and Hair
When drawing skin texture, it’s essential to observe the direction of the pores and hair in the skin. Pores are tiny openings in the skin that help regulate body temperature and secrete oil. Hair follicles are also present in the skin and grow out of the pores. By observing the direction of pores and hair and creating your strokes accordingly, you can create realistic and believable skin texture in your artwork.
Tips and Techniques for Drawing Skin Texture with Pencil
There are several tips and techniques you can use to create realistic skin texture with pencil. Some of these include:
- Use reference photos to observe the texture and anatomy of the skin
- Practice different shading and texture techniques, such as cross-hatching, stippling, and blending
- Observe the light source and create shading and texture that accurately represents how light interacts with the skin
- Use a range of pencils of different hardness to create varied texture and depth
- Experiment with erasers to create highlights and texture
Question and Answer
How do you create wrinkles in skin texture?
The key to creating realistic wrinkles in skin texture is observing the way light interacts with the skin. By creating shading and texture that mimics the direction and intensity of light, you can create believable wrinkles. Additionally, varying the thickness and pressure of your strokes can help create depth and realism in your wrinkles.
What is the best technique for creating texture in skin?
There are several techniques you can use to create texture in skin, including cross-hatching, stippling, and blending. Experiment with these techniques and find the one that works best for the effect you want to achieve.
What is the importance of observing the direction of pores in the skin?
Observing the direction of pores is crucial when creating skin texture because it affects the overall appearance of the skin. By creating strokes that mimic the direction of pores, you can create texture that is accurate and believable. Additionally, observing the direction of pores can help you create shading and texture that accurately represents the way light interacts with the skin.
What is the best way to practice drawing skin texture with pencil?
The best way to practice drawing skin texture with pencil is by using reference photos and observing the anatomy and texture of the skin. Additionally, practice different shading and texture techniques to create varied and realistic skin texture. Don’t be afraid to experiment and try new techniques until you find the one that works best for you.
Conclusion of How to Draw Skin Texture with Pencil
Creating realistic skin texture with pencil is no easy feat, but with the right techniques and practice, it is possible. By understanding the elements of the skin, such as the layers and direction of pores, and observing the lighting conditions, you can create artwork that accurately represents the texture and appearance of the skin. With these tips and techniques, you’ll be on your way to mastering the art of drawing skin texture with pencil.
Gallery
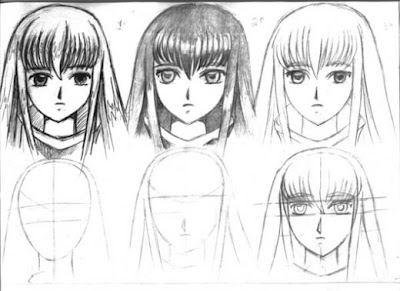
How To Draw Skin - VERY SIMPLE! - YouTube

Photo Credit by: bing.com / skin draw simple very
How To Draw Skin Texture | Filipino Artists - Visual Arts Around The World.

Photo Credit by: bing.com /
Pattern Texture And Technique Exercises | Texture Drawing, Drawing
Photo Credit by: bing.com / practice
How To Draw Realistic Skin On Face With Graphite Pencils - Wrinkles
Photo Credit by: bing.com / realistic graphite pencils wrinkles pores freckles
How To Draw REALISTIC SKIN TEXTURE In PENCIL - Narrated Tutorial
Photo Credit by: bing.com / skin texture pencil realistic draw drawing drawings tutorial